Category Archives: Web
Web related topics-server-cdn-sessions
The Azure Container Service
The Azure Container Service (ACS) is a cloud-based container deployment and management service that supports popular open-source tools and technologies for container and container orchestration. ACS allows you to run containers at scale in production and manages the underlying infrastructure for you by configuring the appropriate VMs and clusters for you. ACS is orchestrator-agnostic and allows you to use the container orchestration solution that best suits your needs. Learn how to use ACS to scale and orchestrate applications using DC/OS, Docker Swarm, or Kubernetes.
Azure Container Instances let you run a container in Azure without managing virtual machines and without a higher-level service.
How to build container instances
How to update certificate to use the SHA-2 hashing algorithm
Followed by National Institute of Standards and Technology (NIST) recommendations certificates encrypted with the Secure Hash Algorithm-1 (SHA-1) algorithm will stop supporting after 2017.Accourding to experts, using the SHA-1 hashing algorithm in digital certificates could allow an attacker to spoof content, perform phishing attacks, or perform man-in-the-middle attacks.SHA-1(more than 98%) is currently the most widely used digest algorithm.
Microsoft is announcing a policy change to the Microsoft Root Certificate Program and Windows will stop accepting SHA-1 end-entity certificates by January 1, 2017, and will stop accepting SHA-1 code signing certificates without timestamps after January 1, 2016.
Google Chrome has started warning end users when they connect to a secure website using SSL certificates encrypted with the SHA-1 algorithm (read google blog http://googleonlinesecurity.blogspot.in/2014/09/gradually-sunsetting-sha-1.html).
Read more how to do
Google Authenticator
Google Authenticator is an application that implements Time-based One-time Password Algorithm (TOTP) security tokens in mobile apps made by Google.The Authenticator can also generate codes for third-party applications or file hosting services.Previous versions of the software were open source but subsequent releases are proprietary.

Working
The service provider generates an 80-bit secret key for each user (in contravention of RFC 4226 §4[33]). This is provided as a 16, 24 or 32 character base32 string or as a QR code. The client creates an HMAC-SHA1 using this secret key.
users will install the Authenticator app on their smartphone to log into a site or service that uses two-factor authentication, they provide user name and password to the site and run the Authenticator app which produces an additional six-digit one-time password. The user provides this to the site, the site checks it for correctness and authenticates the user.
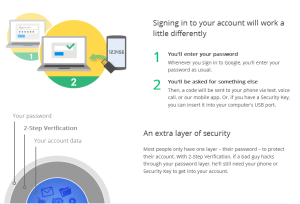

How to two-step authentication is enabled for your Google account
1.Make sure that two-step authentication is enabled and configured for your account.
2.Download and install the app on your Android device or on your iPhone, iPad or iPod Touch
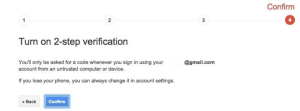
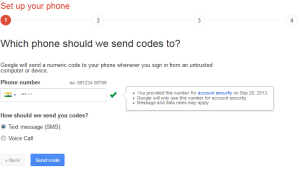
3.Login to your Google account at http://accounts.google.com. Choose “Security” from the left-side menu, then look for “2-step verification” and click “Edit”. You may need to login again.
Connect your Google Authenticator app to your Google account by following the prompts after “How to Connect” a Mobile Application.
Setting up for google applications.


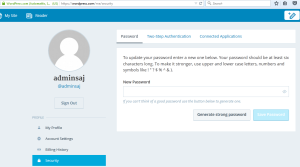
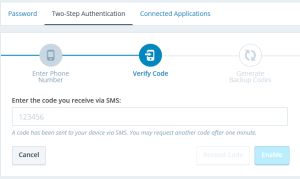
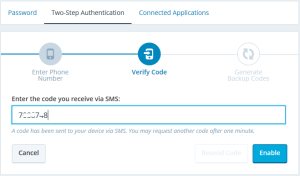
Setting up OTP for WordPress
Install Google Authenticator
https://support.google.com/accounts/answer/1066447?hl=en
How to Browser Default Language changing
Below documents shows how to change default language in Internet Explorer,Mozilla and Chrome.
Nginx using as load balancer
Basic HTTP server features
Serving static and index files, autoindexing; open file descriptor cache;
Accelerated reverse proxying with caching; simple load balancing and fault tolerance;
Accelerated support with caching of FastCGI, uwsgi, SCGI, and memcached servers; simple load balancing and fault tolerance;
Modular architecture. Filters include gzipping, byte ranges, chunked responses, XSLT, SSI, and image transformation filter. Multiple SSI inclusions within a single page can be processed in parallel if they are handled by proxied or FastCGI/uwsgi/SCGI servers;
SSL and TLS SNI support.
Other HTTP server features
Name-based and IP-based virtual servers;
Keep-alive and pipelined connections support;
Flexible configuration;
Reconfiguration and upgrade of an executable without interruption of the client servicing;
Access log formats, buffered log writing, fast log rotation, and syslog logging;
3xx-5xx error codes redirection;
The rewrite module: URI changing using regular expressions;
Executing different functions depending on the client address;
Access control based on client IP address, by password (HTTP Basic authentication) and by the result of subrequest;
Validation of HTTP referer;
The PUT, DELETE, MKCOL, COPY, and MOVE methods;
FLV and MP4 streaming;
Response rate limiting;
Limiting the number of simultaneous connections or requests coming from one address;
Embedded Perl.
Load balancing methods
The following load balancing mechanisms (or methods) are supported in nginx:
round-robin — requests to the application servers are distributed in a round-robin fashion,
least-connected — next request is assigned to the server with the least number of active connections,
ip-hash — a hash-function is used to determine what server should be selected for the next request (based on the client’s IP address).
Default load balancing configuration
The simplest configuration for load balancing with nginx may look like the following:
http {
upstream myapp1 {
server srv1.example.com;
server srv2.example.com;
server srv3.example.com;
}
server {
listen 80;
location / {
proxy_pass http://myapp1;
}
}
}
In the example above, there are 3 instances of the same application running on srv1-srv3. When the load balancing method is not specifically configured, it defaults to round-robin. All requests are proxied to the server group myapp1, and nginx applies HTTP load balancing to distribute the requests.
Reverse proxy implementation in nginx includes load balancing for HTTP, HTTPS, FastCGI, uwsgi, SCGI, and memcached.
To configure load balancing for HTTPS instead of HTTP, just use “https” as the protocol.
When setting up load balancing for FastCGI, uwsgi, SCGI, or memcached, use fastcgi_pass, uwsgi_pass, scgi_pass, and memcached_pass directives respectively.
Least connected load balancing
Another load balancing discipline is least-connected. Least-connected allows controlling the load on application instances more fairly in a situation when some of the requests take longer to complete.
With the least-connected load balancing, nginx will try not to overload a busy application server with excessive requests, distributing the new requests to a less busy server instead.
Least-connected load balancing in nginx is activated when the least_conn directive is used as part of the server group configuration:
upstream myapp1 {
least_conn;
server srv1.example.com;
server srv2.example.com;
server srv3.example.com;
}
Session persistence
Please note that with round-robin or least-connected load balancing, each subsequent client’s request can be potentially distributed to a different server. There is no guarantee that the same client will be always directed to the same server.
If there is the need to tie a client to a particular application server — in other words, make the client’s session “sticky” or “persistent” in terms of always trying to select a particular server — the ip-hash load balancing mechanism can be used.
With ip-hash, the client’s IP address is used as a hashing key to determine what server in a server group should be selected for the client’s requests. This method ensures that the requests from the same client will always be directed to the same server except when this server is unavailable.
To configure ip-hash load balancing, just add the ip_hash directive to the server (upstream) group configuration:
upstream myapp1 {
ip_hash;
server srv1.example.com;
server srv2.example.com;
server srv3.example.com;
}
Weighted load balancing
It is also possible to influence nginx load balancing algorithms even further by using server weights.
In the examples above, the server weights are not configured which means that all specified servers are treated as equally qualified for a particular load balancing method.
With the round-robin in particular it also means a more or less equal distribution of requests across the servers — provided there are enough requests, and when the requests are processed in a uniform manner and completed fast enough.
When the weight parameter is specified for a server, the weight is accounted as part of the load balancing decision.
upstream myapp1 {
server srv1.example.com weight=3;
server srv2.example.com;
server srv3.example.com;
}
With this configuration, every 5 new requests will be distributed across the application instances as the following: 3 requests will be directed to srv1, one request will go to srv2, and another one — to srv3.
It is similarly possible to use weights with the least-connected and ip-hash load balancing in the recent versions of nginx.
Health checks
Reverse proxy implementation in nginx includes in-band (or passive) server health checks. If the response from a particular server fails with an error, nginx will mark this server as failed, and will try to avoid selecting this server for subsequent inbound requests for a while.
The max_fails directive sets the number of consecutive unsuccessful attempts to communicate with the server that should happen during fail_timeout. By default, max_fails is set to 1. When it is set to 0, health checks are disabled for this server. The fail_timeout parameter also defines how long the server will be marked as failed. After fail_timeout interval following the server failure, nginx will start to gracefully probe the server with the live client’s requests. If the probes have been successful, the server is marked as a live one.
Other posts
NginX
nginx [engine x] is an HTTP and reverse proxy server, as well as a mail proxy server, written by Igor Sysoev. According to Netcraft, nginx served or proxied 21.21% busiest sites in February 2015.Netflix, WordPress.com, FastMailare used by ngix for eg.
Apache powers more websites,because it has been available for so many years and Microsoft IIS is in next place.Using apache slows down under heavy load, because of the need to spawn new processes,it also creates new threads that must compete with others for access to memory and CPU.
Installation and configurations
TMG2010-End Of Life
Microsoft discontinued(EOL-End Of Life)Forefront TMG 2010 product.Thismeans
there will not be another new version of TMG in the future, and there will be
no more feature enhancements made to TMG (only security updates and bug
fixes),But announced will continue to provide mainstream support for TMG until
April 14, 2015, and extended support until April 14, 2020. The Forefront TMG
2010 Web Protection Services (WPS) will be discontinued on December 31, 2015.
Beginning on January 1, 2016, Web Protection Services (URL filtering,
virus/malicious software scanning, and Network Inspection System) will
continue to function but will no longer receive updates.
This is the time to think to considering a replacement for your Forefront TMG
2010 firewall deployed your network.
AS per Richard Hicks from Celestix networks,Microsoft OEM partner They also
stated that they would discontinue selling TMG later that year.
(http://www.celestix.com/best-forefront-tmg-2010-replacement-forefront-tmg-
2010/)
There is no reason reported from Microsoft,but seems to be Forefront TMG 2010
cannot be installed on the latest release of the Windows Server operating
system(windows 2012).Supported OS is(recommended os by Microsoft is Windows
Server 2008 R2 which is not as secure as Windows Server 2012 R2.Also, not
possible to install Forfront on Windows Server core
(http://technet.microsoft.com/en-in/library/dd896981.aspx).
Medium to large enterprise want more than the basic protection capabilities
and not likely to rely on Windows Defender (or Microsoft Security Essentials).
Read Microsoft official annoncement of product lifecycle.
http://support2.microsoft.com/lifecycle/search/default.aspx?
sort=PN&alpha=Forefront&Filter=FilterNO
So,what is the replacement for TMG used places
Replacing TMG with UTM
F5
Click to access f5-tmg-replacement-dg.pdf
Barracuda
https://www.barracuda.com/tmg
Celestix MSA
http://www.celestix.com/products/msa/
Netscalar
https://www.citrix.com/content/dam/citrix/en_us/documents/products-
solutions/netscaler-a-comprehensive-replacement-for-microsoft-forefront-
threat-management-gateway.pdf
watchguard
http://www.watchguard.com/
Fortinet
http://www.fortinet.com/
softwares
Web cache/accelerator/filter/proxy:Sqiud/varnish/Nginx
Microsoft Forefront Threat Management Gateway (TMG) 2010
Forefront TMG is a comprehensive secure web gateway solution that helps to
protect users from web-based threats(a proxy server, a firewall, a web content
filtering, a VPN Server,intrusion prevention,malware inspection etc).This is
revised version of Microsoft Internet Security and Acceleration Server (ISA
Server)of windows 2008(http://msdn.microsoft.com/en-us/security/aa570369.aspx)
What’s new in Forefront TMG 2010 SP2
http://technet.microsoft.com/en-US/library/hh301099.aspx
For making your system as TMG, you required 2 Network card ,one is LAN
(internal networks)and a WAN(Internet)
System requirements for Forefront TMG
http://technet.microsoft.com/en-us/library/dd896981.aspx
Installations are usual by clicking next and finish.
Installation design guide for Forefront TMG
http://technet.microsoft.com/en-us/library/dd896984.aspx
There is a step by step guide from
HTTP and HTTPS rule
By default all access rules are denied. You need to Create web access rules
for internal networks allowing HTTP and HTTPs traffic pass through from
internal network to external and perimeter. Also allow HTTP and HTTPs traffic
pass through from perimeter to external and internal.
Click Firewall Policy>Click Create Access Rule on Task Pan.
References
Installing Forefront TMG on a domain controller
http://technet.microsoft.com/en-us/library/ff808305.aspx
Configuring networks and routing
http://technet.microsoft.com/en-us/library/dd440997.aspx
Configuring roles and permissions
http://technet.microsoft.com/en-us/library/dd441007.aspx
Configuring client computers
http://technet.microsoft.com/en-us/library/cc441532.aspx
Configuring client authentication servers
http://technet.microsoft.com/en-us/library/cc441510.aspx
Configuring Network Access Protection
http://technet.microsoft.com/en-us/library/dd440978.aspx
POODLE Attack
Thai Duong and Krzysztof Kotowicz from the Google Security Team discovered
this SSL(Secure Socket Layer) vulnerability in September 2014.The POODLE
(Padding Oracle On Downgraded Legacy Encryption) attack are not serious as the
Heartbleed and Shellshock attacks.On December 8, 2014 a variation of the
POODLE vulnerability that impacted TLS was announced.
The CVE ID’s(CVE-2014-3566 and CVE-2014-8730) associated with the original
POODLE attack and F5 Networks’ faulty implementation of TLS that allows
POODLE.
There is currently no fix for the vulnerability SSL 3.0.To mitigate the POODLE
attack,completely disable SSL 3.0 on the Server and client side.But, some old
clients and servers do not support TLS 1.0 and above. Thus,for such clients
browser and server better to implement TLS_FALLBACK_SCSV.
https://tools.ietf.org/html/draft-ietf-tls-downgrade-scsv-00
Browser enabled
===============
Opera 25 has implemented this mitigation in addition to TLS_FALLBACK_SCSV.
Chrome 39,already support TLS_FALLBACK_SCSV.
Mozilla has disabled SSL 3.0 in Firefox 34 and ESR 31.3, which were released
in December 2014, and will add support of TLS_FALLBACK_SCSV in Firefox 35.
Microsoft announced the plan to disable SSL 3.0 by default in their products
and services and a fix for to disable SSL 3.0 in Internet Explorer and Windows
OS.
Apple’s Safari (on OS X 10.8, iOS 8.1 and later) has been mitigated against
POODLE by removing support for all CBC protocols in SSL 3.0.
Service providers status
————————
OpenSSL has added support for TLS_FALLBACK_SCSV to their latest versions and
recommend the following upgrades
OpenSSL 1.0.1 users should upgrade to 1.0.1j.
OpenSSL 1.0.0 users should upgrade to 1.0.0o.OpenSSL 0.9.8 users should
upgrade to 0.9.8zc.
Both clients and servers need to support TLS_FALLBACK_SCSV to prevent
downgrade attacks
Akamai, a popular CDN, has accelerated its deprecation of SSL 3.0.
CloudFlare has disabled SSL 3.0 support by default for all customers.
Twitter and Wikimedia have dropped support of SSL 3.0 to prevent the POODLE
attack.
Click to access ssl-poodle.pdf
http://www.symantec.com/connect/blogs/ssl-30-vulnerability-poodle-bug-aka-
poodlebleed
How to check your server&client
===============================
Web site test
https://www.ssllabs.com/ssltest/
Client test
https://www.ssllabs.com/ssltest/viewMyClient.html
Resolutions for Server and Clients
==================================
Disable in Microsoft Server
—————————
Microsoft OS registry disable for SSL
HKey_Local_Machine\System\CurrentControlSet\Control\SecurityProviders
\SCHANNEL\Protocols\SSL 3.0\Server
On the Edit menu, click Add Value.
In the Data Type list, click DWORD.
In the Value Name box, type Enabled, and then click OK.
Type 00000000 in Binary Editor to set the value of the new key equal to “0”
and restart.
CVE-2014-3566 – KB3009008
https://technet.microsoft.com/en-us/library/security/3009008.aspx
How to disable SSLv3 in Apache?
——————————-
Include “SSLProtocol all -SSLv2 -SSLv3 ” within every VirtualHost in
httpd.conf of version 2.2.23
<VirtualHost your.website.example.com:443>
DocumentRoot /var/www/directory
ServerName your.website.example.com
…
SSLEngine on
…
SSLProtocol all -SSLv2 -SSLv3
…
</VirtualHost>
Note : if there is separeate ssl configuration like Ubuntu 10.04
/etc/apache2/mods-available/ssl.conf :
SSLProtocol all -SSLv2 -SSLv3
For httpd version 2.2.22 and older, only specify TLSv1. This is treated as a
wildcard for all TLS versions.
SSLProtocol TLSv1
For Apache + mod_nss, edit /etc/httpd/conf.d/nss.conf to allow only TLS 1.0+.
NSSProtocol TLSv1.0,TLSv1.1
Apache Tomcat Web server
————————
Tomcat 5
Configured via $TOMCAT_HOME/conf/server.xml
<Connector
protocol=”org.apache.coyote.http11.Http11AprProtocol”
port=”8443″ maxThreads=”200″
SSLEnabled=”true” scheme=”https” secure=”true”
SSLCertificateFile=”/usr/local/ssl/server.crt”
SSLCertificateKeyFile=”/usr/local/ssl/server.pem”
clientAuth=”false” sslProtocols = “TLSv1,TLSv1.1,TLSv1.2″ />
Tomcat 6,7
<Connector
protocol=”org.apache.coyote.http11.Http11AprProtocol”
port=”8443″ maxThreads=”200″
SSLEnabled=”true” scheme=”https” secure=”true”
SSLCertificateFile=”/usr/local/ssl/server.crt”
SSLCertificateKeyFile=”/usr/local/ssl/server.pem”
clientAuth=”false” sslEnabledProtocols = “TLSv1,TLSv1.1,TLSv1.2” />
Lighthttpd
————
For Lighttpd 1.4.28+, edit /etc/lighttpd/lighttpd.conf
ssl.use-sslv2 = “disable”
ssl.use-sslv3 = “disable”
Postfix SMTP
————-
Modify the smtpd_tls_mandatory_protocols configuration line.
smtpd_tls_mandatory_protocols=!SSLv2,!SSLv3
Sendmail
———
Modify the LOCAL_CONFIG section of the sendmail.mc file.
CipherList=HIGH
ServerSSLOptions=+SSL_OP_NO_SSLv2 +SSL_OP_NO_SSLv3
+SSL_OP_CIPHER_SERVER_PREFERENCE
ClientSSLOptions=+SSL_OP_NO_SSLv2 +SSL_OP_NO_SSLv3
Dovecot
——–
For Dovecot 2.1+, edit /etc/dovecot/local.conf to add the below lines and then
restart Dovecot.
ssl_protocols = !SSLv2 !SSLv3
For Dovecot 2, edit /etc/dovecot/conf.d/10-ssl.conf to add the below lines and
then restart Dovecot.
ssl_cipher_list = ALL:!LOW:!SSLv2:!SSLv3:!EXP:!aNULL
Courier-imap
————-
For Ubuntu 12.04, edit /etc/courier/imapd-ssl.
IMAPDSSLSTART=NO
IMAPDSTARTTLS=YES
IMAP_TLS_REQUIRED=1
TLS_PROTOCOL=TLS1
TLS_STARTTLS_PROTOCOL=TLS1
HAProxy Server
—————-
Edit the bind line in your /etc/haproxy.cfb file.
bind :443 ssl crt ciphers no-sslv3
Nginx
—–
Modify the ssl_protocols directive to only use TLSv1, TLSv1.1, and TLSv1.2. If
you do not have a ssl_protocols directive, add it to the top of your
configuration file.
ssl_protocols TLSv1 TLSv1.1 TLSv1.2;
389 Directory Server
——————–
Modify cn=encryption,cn=configA and restart the server.
ldapmodify -x -D “cn=Directory Manager” -W <<EOF
dn: cn=encryption,cn=config
changetype: modify
replace: nsSSL3
nsSSL3: off
Enabling on Browser Settings
—————————-
Chrome:
right click on shortcu and go to properties,and go to end “C:\Program Files
\Google\Chrome\Application\chrome.exe” add type ––ssl-version-min=tls1
IE:
Click on the Settings and then Internet options,advanced tab then security
section,un check SSL and check TLS
Firefox:
download and install the SSL Version Control 0.2 add-on from
https://addons.mozilla.org/en-US/firefox/addon/ssl-version-control/
Alternatively, you can set the value security.tls.version.min = 1 in the
about:config dialog.
Safari:
Apple has released Security Update 2014-005, which disables CBC-mode ciphers
in coordination with SSLv3.
Mac OS Mavericks: http://support.apple.com/kb/DL1772
MAC OS Mountain Lion: http://support.apple.com/kb/DL1771
MAC OS Yosemite: https://support.apple.com/kb/HT6535
Hardware providers
==================
F5 Networks
———–
https://support.f5.com/kb/en-us/solutions/public/15000/800/sol15882.html
A10 Networks
————
https://www.a10networks.com/vadc/index.php/cve-2014-3566-from-beast-to-
poodle-or-dancing-with-beast/
Cisco Networks
—————
http://tools.cisco.com/security/center/content/CiscoSecurityAdvisory/cisco-
sa-20141015-poodle
http://www.cisco.com/web/about/security/intelligence/Cisco_ERP_Poodle_10152014
.html
Juniper Networks
—————–
http://kb.juniper.net/InfoCenter/index?page=content&id=JSA10656&actp=RSS
Note:POODLE attack against TLS
A new variant of the original POODLE attack was announced on December 8, 2014.
This attack exploits implementation flaws of CBC mode ciphers in the TLS 1.0 –
1.2 protocols. Even though TLS specifications require servers to check the
padding, some implementations fail to validate it properly, which makes some
servers vulnerable to POODLE even if they disable SSL 3.0. SSL Pulse showed
“about 10% of the servers are vulnerable to the POODLE attack against TLS”
before this vulnerability is announced. The CVE ID for F5 Networks’
implementation bug is CVE-2014-8730. The entry in NIST’s NVD states that this
CVE ID is to be used only for F5 Networks’ implementation of TLS, and that
other vendors whose products have the same failure to validate the padding
mistake in their implementations like A10 Networks and Cisco Systems need to
issue their own CVE ID’s for their implementation errors because this is not a
flaw in the protocol itself and is a flaw in the protocol’s implementation.
The POODLE attack against TLS was found to be easier to initiate than the
initial POODLE attack against SSL. There is no need to downgrade clients to
SSL 3.0, requiring less real-world scenarios to appear active.
Openssl cert generation
Generate a Private Key
———————-
This key is a 1024 bit RSA key which is encrypted using Triple-DES and stored in a PEM format so that it is readable as ASCII text.
openssl genrsa -des3 -out server.key 1024
Generate a CSR (Certificate Signing Request)
——————————————–
These are the X.509 attributes of the certificate.
openssl req -new -key server.key -out server.csr
Remove Passphrase from Key
————————–
One unfortunate side-effect of the pass-phrased private key is that Apache will ask for the pass-phrase each time the web server is started.
cp server.key server.key.org
openssl rsa -in server.key.org -out server.key
Generating a Self-Signed Certificate
————————————-
To generate a temporary certificate which is good for 365 days
openssl x509 -req -days 365 -in server.csr -signkey server.key -out server.crt
Installing the Private Key and Certificate
——————————————
cp server.crt /usr/local/apache/conf/ssl.crt
cp server.key /usr/local/apache/conf/ssl.key
If using certificates in Apache then
Configuring SSL Enabled Virtual Hosts
————————————
SSLEngine on
SSLCertificateFile /usr/local/apache/conf/ssl.crt/server.crt
SSLCertificateKeyFile /usr/local/apache/conf/ssl.key/server.key
SetEnvIf User-Agent “.*MSIE.*” nokeepalive ssl-unclean-shutdown
CustomLog logs/ssl_request_log \
“%t %h %{SSL_PROTOCOL}x %{SSL_CIPHER}x \”%r\” %b”
Restart Apache and Test
————————-
/etc/init.d/httpd stop
/etc/init.d/httpd stop

